AWS: DynamoDB + API Gateway를 사용해 Serverless RESTful API 만들기
Serverless API/Database
AWS Lambda를 이용하지 않고, 서버리스 API/Database를 만드는 법을 공유한다.
DynamoDB + API Gateway
-
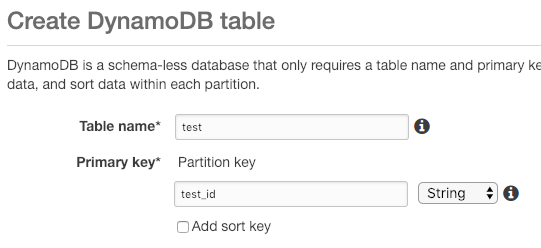
먼저 DynamoDB에 Table을 만들어준다.
-
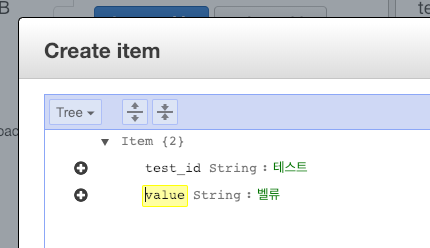
Create item으로 테스트 용 데이터를 넣어주자.
-
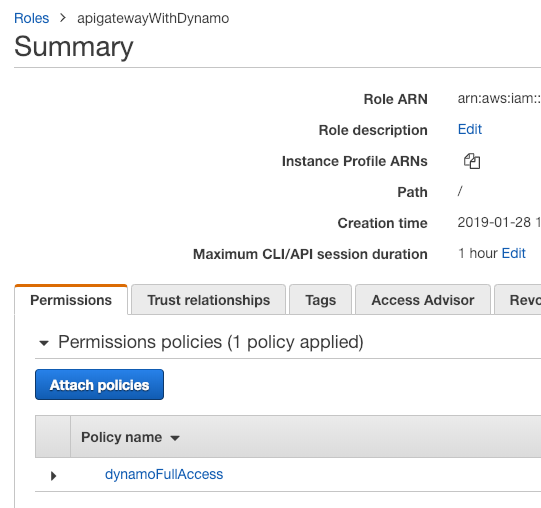
API Gateway를 설정하기 전에 Role을 만들어주어야 한다.
 그림과 같이 DynamoDB에 Full Access를 할 수있는
 Policy를 가지는Role을 만들어준다. -
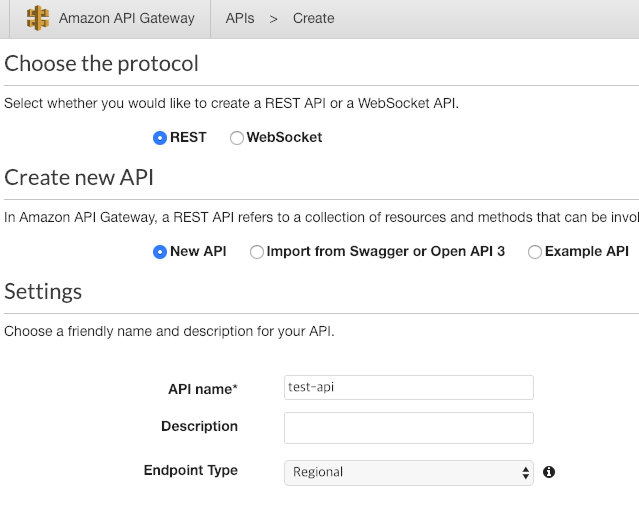
이제 API Gateway를 만들어준다.
 현재는 테스트기 때문에
 Edge optimized는 사용하지 않고Regional로Endpoint Type을 설정한다. -
API가 만들어지면, 리소스를 생성한다.

RESTful한 API 규칙을 따라줘야 추후에API Gateway caching을 이용할 수 있다. (paramter까지 캐싱하지 않기 때문에)Resource name/path를{test_id}로 설정하여DynamoDB의PK를 받을 수 있도록 만들자. - 리소스가 만들어지면, 해당 리소스에
GET메소드를 생성한다.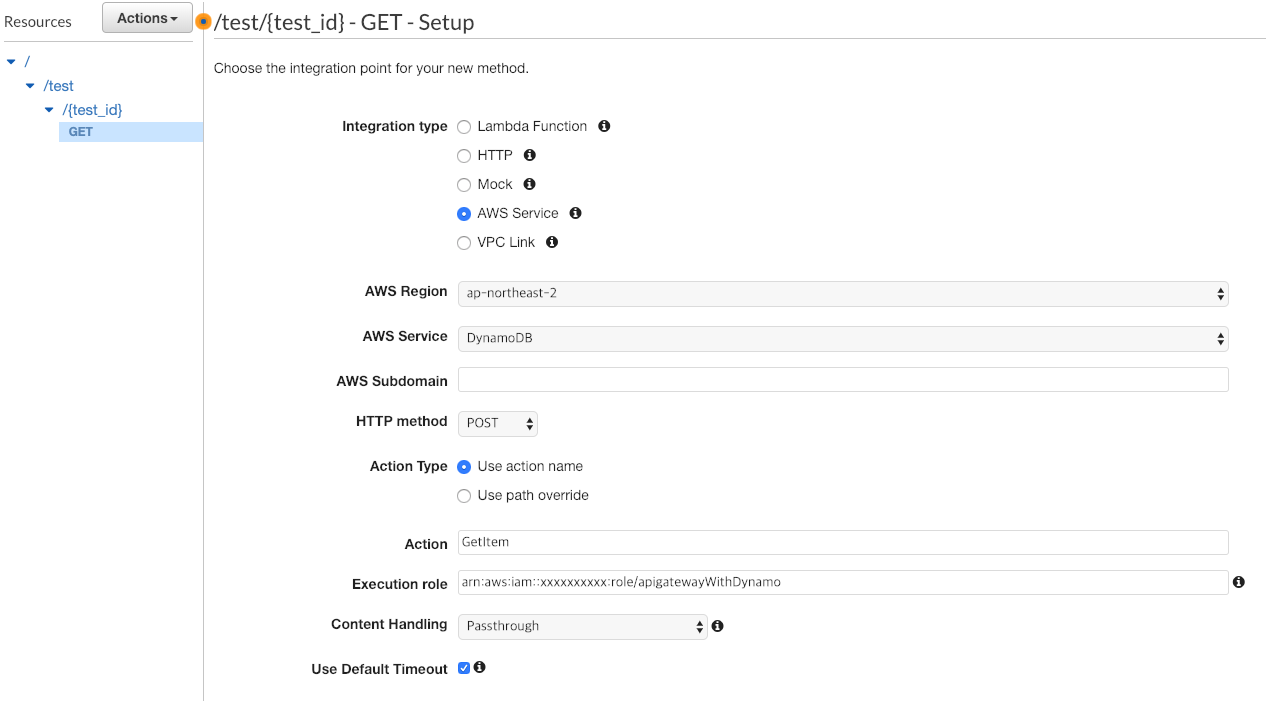
- Intergration type:
AWS Service - AWS Region:
ap-northeast-2 - AWS Service:
DynamoDB - HTTP method:
POSTAPI Gateway>DynamoDB의 통합 호출은 모두POST로 진행해줘야 정상동작 하는 것 같다. 추후에 다시 확인해 볼 예정.
- Action:
GetItem - Execution role: 3번에서 만든
Role의 ARN을 넣어준다.
- Intergration type:
API Gateway의 해당 method의Intergration Request를 클릭하면, 그림과 같이 가장 하단에Mapping Templates가 있다.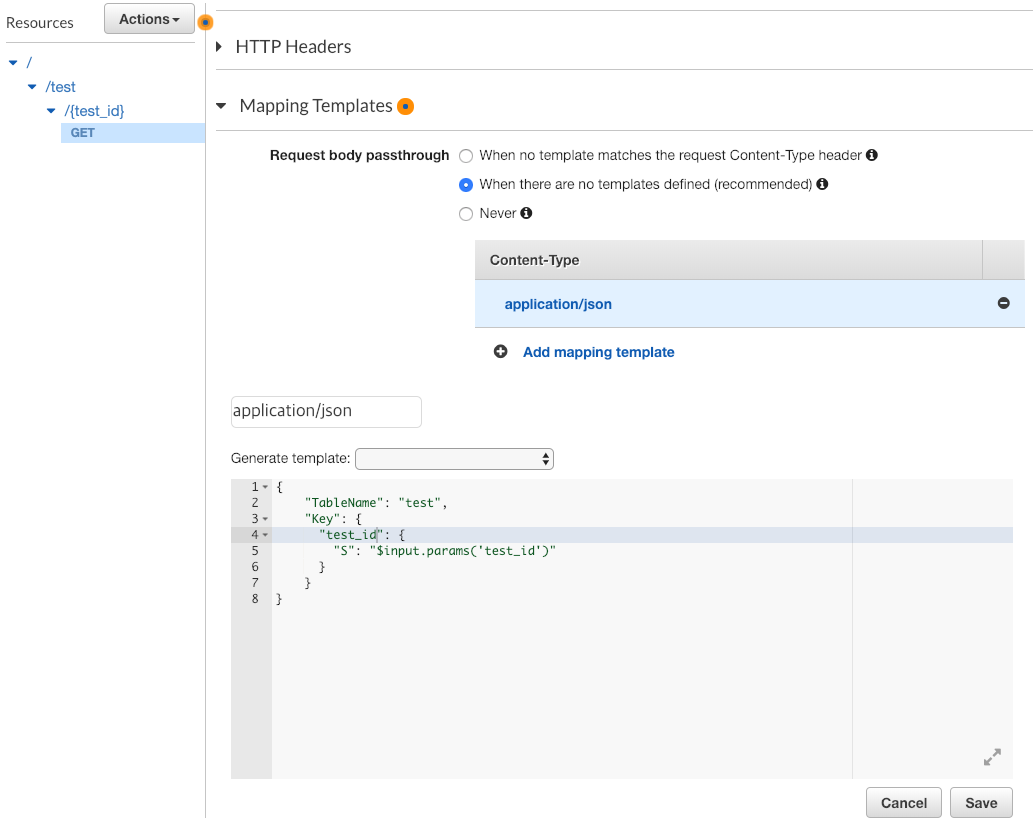
- 템플릿은 공식문서를 참고하면 된다.
application/json을 추가하고test_id를 이용해서test테이블을 조회하는 탬플릿을 작성하고 save한다.{ "TableName": "test", "Key": { "test_id": { "S": "$input.params('test_id')" } } }
-
뒤로가기 한 후에 가장 왼편을 보면 테스트라고 있다. 해당 부분을 클릭하면 다음과 같은 화면을 확인할 수 있다.
 우리가
우리가 DB에 테스트라는test_id를 가지는 데이터를 넣어놨기 때문에, 테스트라는 값을Path에 넣고 실행해보면, 정상적으로 리턴이 오는 걸 확인할 수 있다. GET은 완성하였다. 이제 나머지 메소드들도 만들어보자.
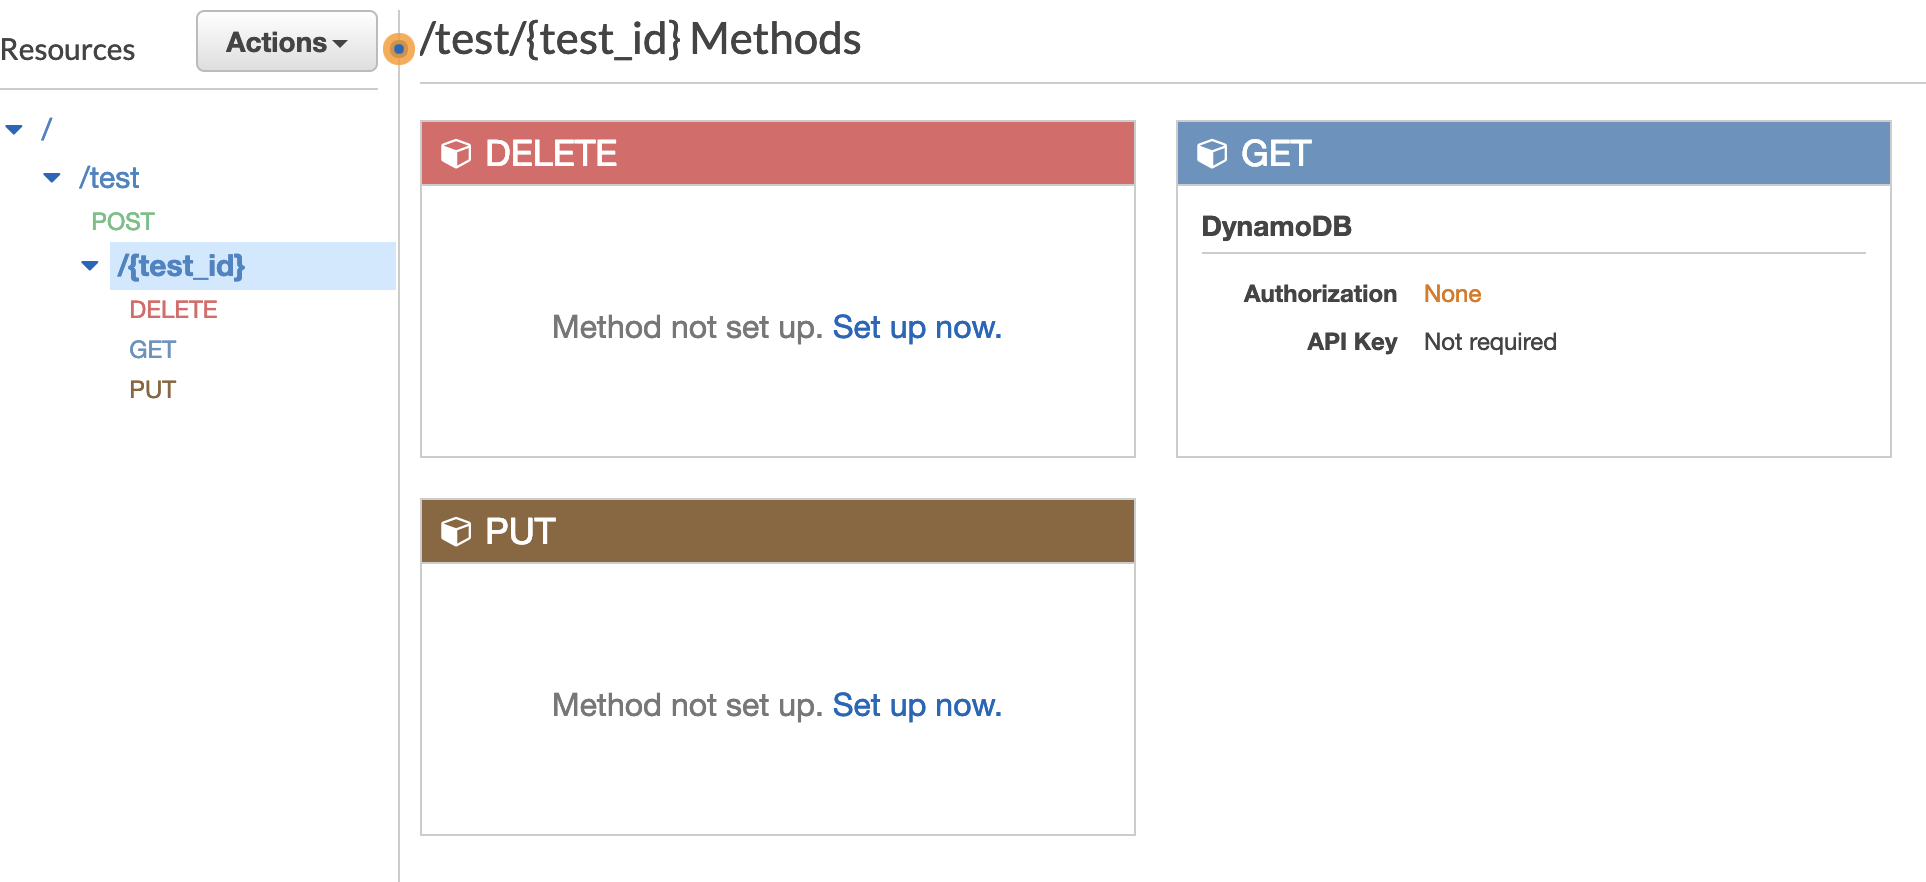 흐름은 다 똑같으므로, 하단에는 리소스 할당 내용과 템플릿만 공유하겠다.
GET
- Intergration type:
AWS Service - AWS Region:
ap-northeast-2 - AWS Service:
DynamoDB - HTTP method:
POST - Action:
GetItem - Execution role: 3번에서 만든
Role의 ARN - Intergration Request - Mapping Templates - application/json
{
 "TableName": "test",
 "Key": {
 "test_id": {
   "S": "$input.params('test_id')"
 }
 }
}
POST
- Intergration type:
AWS Service - AWS Region:
ap-northeast-2 - AWS Service:
DynamoDB - HTTP method:
POST - Action:
PutItem - Execution role: 3번에서 만든
Role의 ARN - Intergration Request - Mapping Templates - application/json
{ "TableName": "test", "Item": { "test_id": { "S": "$input.path('$.test_id')" }, "value": { "S": "$input.path('$.value')" } } }
PUT
- Intergration type:
AWS Service - AWS Region:
ap-northeast-2 - AWS Service:
DynamoDB - HTTP method:
POST - Action:
UpdateItem - Execution role: 3번에서 만든
Role의 ARN - Intergration Request - Mapping Templates - application/json
{ "TableName": "test", "Key": { "test_id": { "S": "$input.params('test_id')" } }, "UpdateExpression": "set value = :val1", "ExpressionAttributeValues": { ":val1": {"S": "$input.path('$.value')"} }, "ReturnValues": "ALL_NEW" }
DELETE
- Intergration type:
AWS Service - AWS Region:
ap-northeast-2 - AWS Service:
DynamoDB - HTTP method:
POST - Action:
DeleteItem - Execution role: 3번에서 만든
Role의 ARN - Intergration Request - Mapping Templates - application/json
{
  "TableName": "test",
  "Key": {
    "test_id": {
      "S": "$input.params('test_id')"
    }
  }
}
주의점
PutItem과 UpdateItem은 크게 차이가 있다. PutItem은 해당 PK를 잡고 데이터를 replace해주고 UpdateItem은 정의한 컬럼값만 set해준다.
완성하였다. 굳이 AWS Lambda를 쓰지 않아도 DynamoDB CRUD API를 만들 수 있었다. 배포는 Deploy API를 통해서 진행하면 된다.